Some bathrooms do not need a new layout. They need the right materials in the right places. This one is a good example: the room was a decent size, the window was in a nice spot and the plumbing lived where it made sense. What held it back was everything you could see and touch. Here is where the bathroom started, what we changed, and the thinking behind each decision.
Where the bathroom started
The old bathroom had the usual signs of a room updated in pieces over the years. Beige tile ran halfway up the walls as a wainscot, the vanity was a wood cabinet with a speckled granite top, and the shower was an enclosed glass stall tucked into an alcove under the roofline. The floor was hardwood, which looks warm on day one and becomes a problem the first time water sits on it.
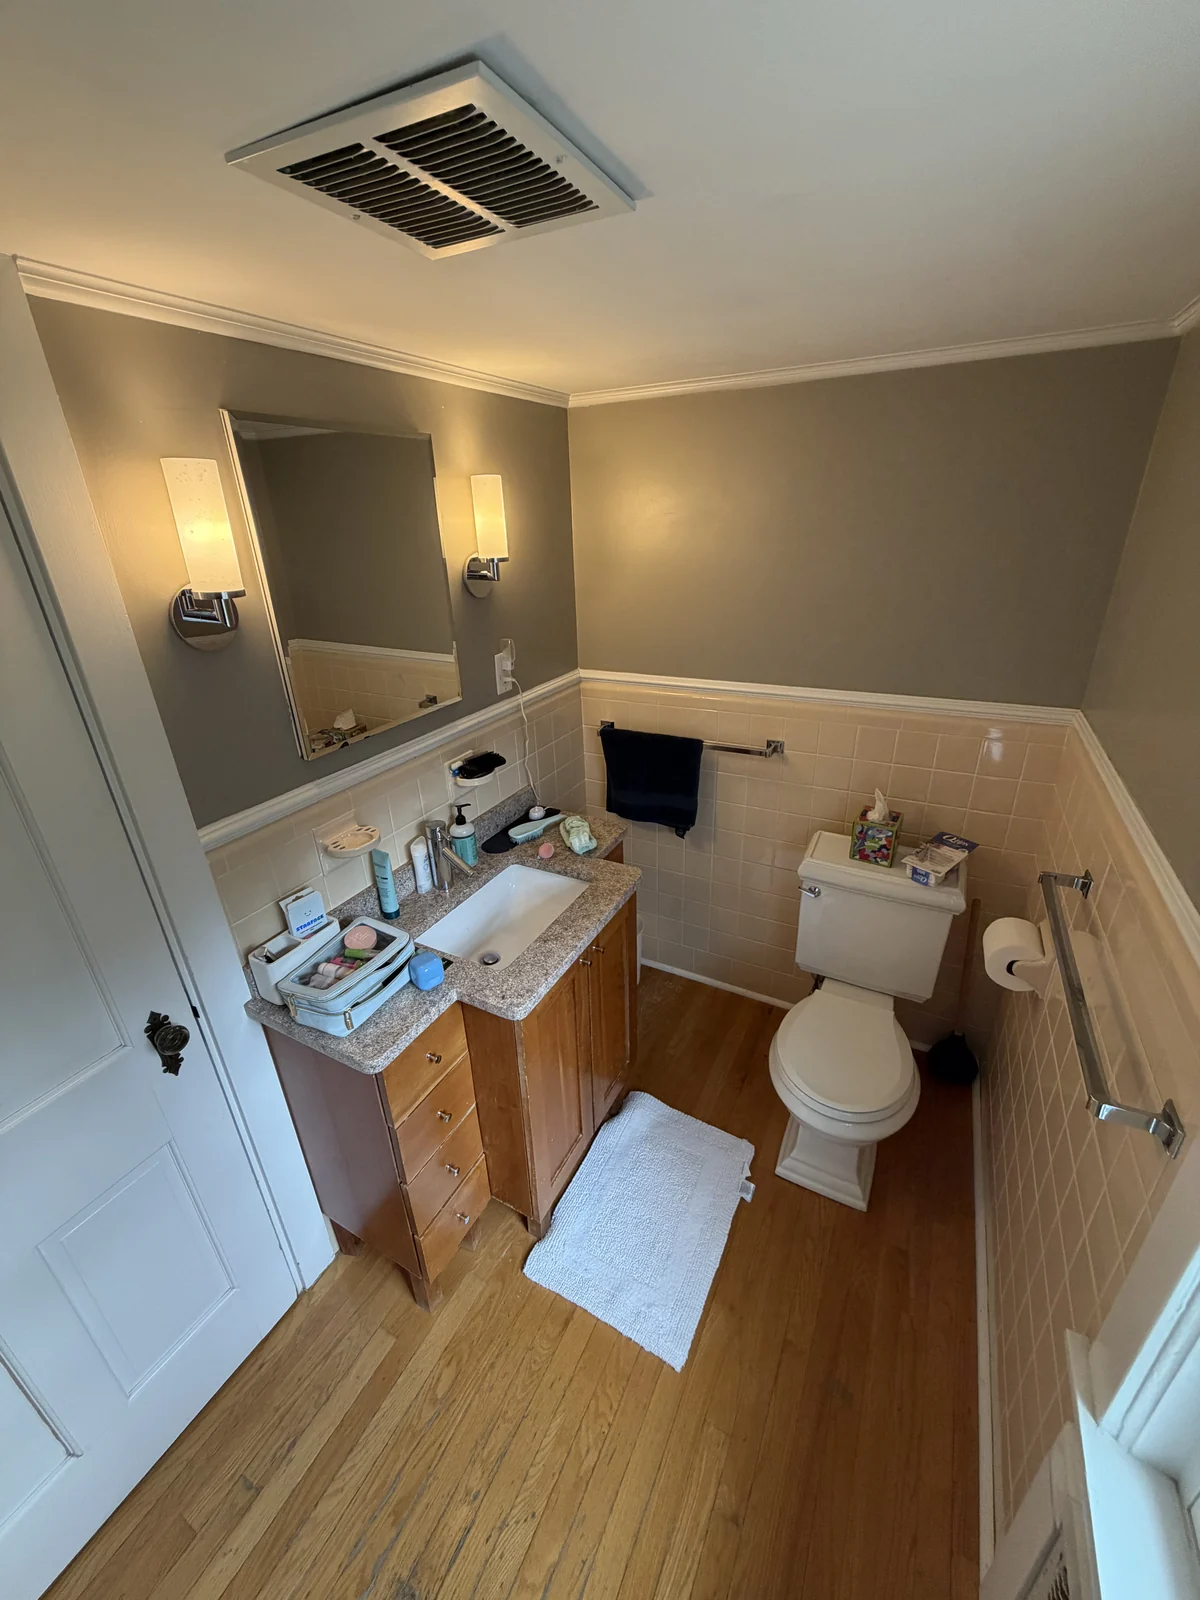
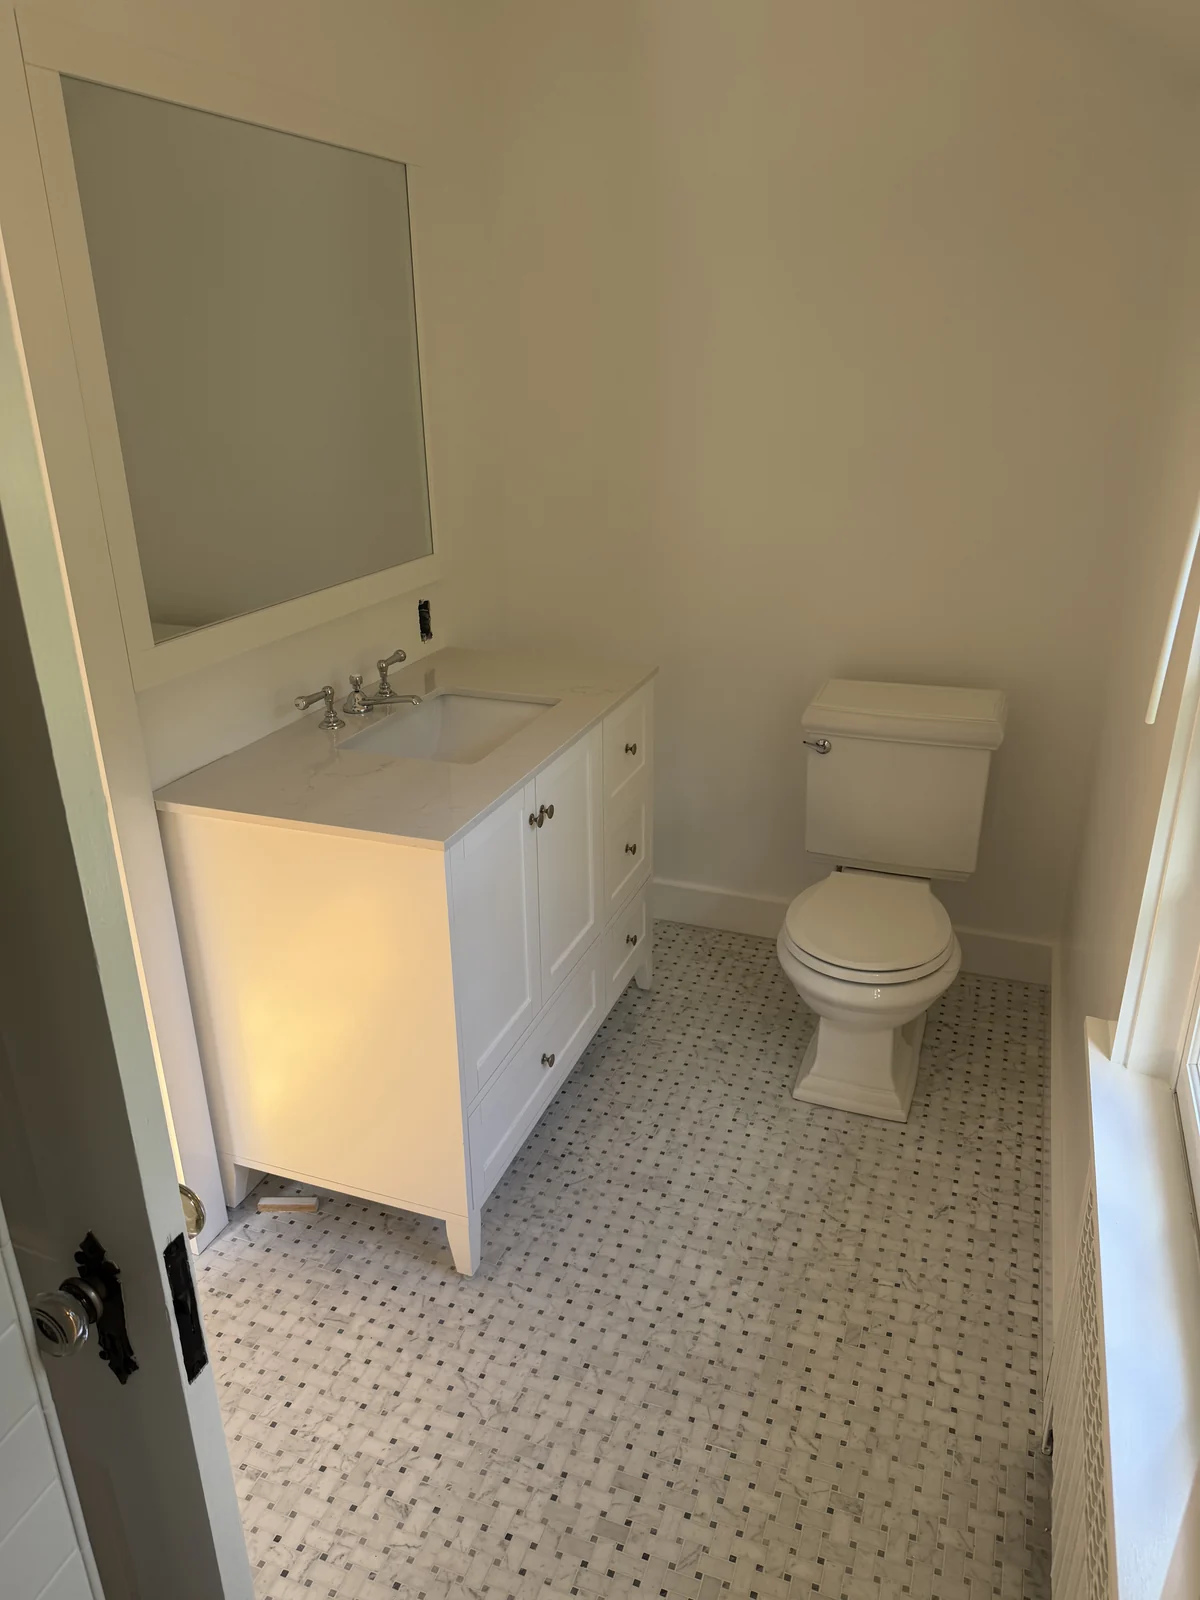
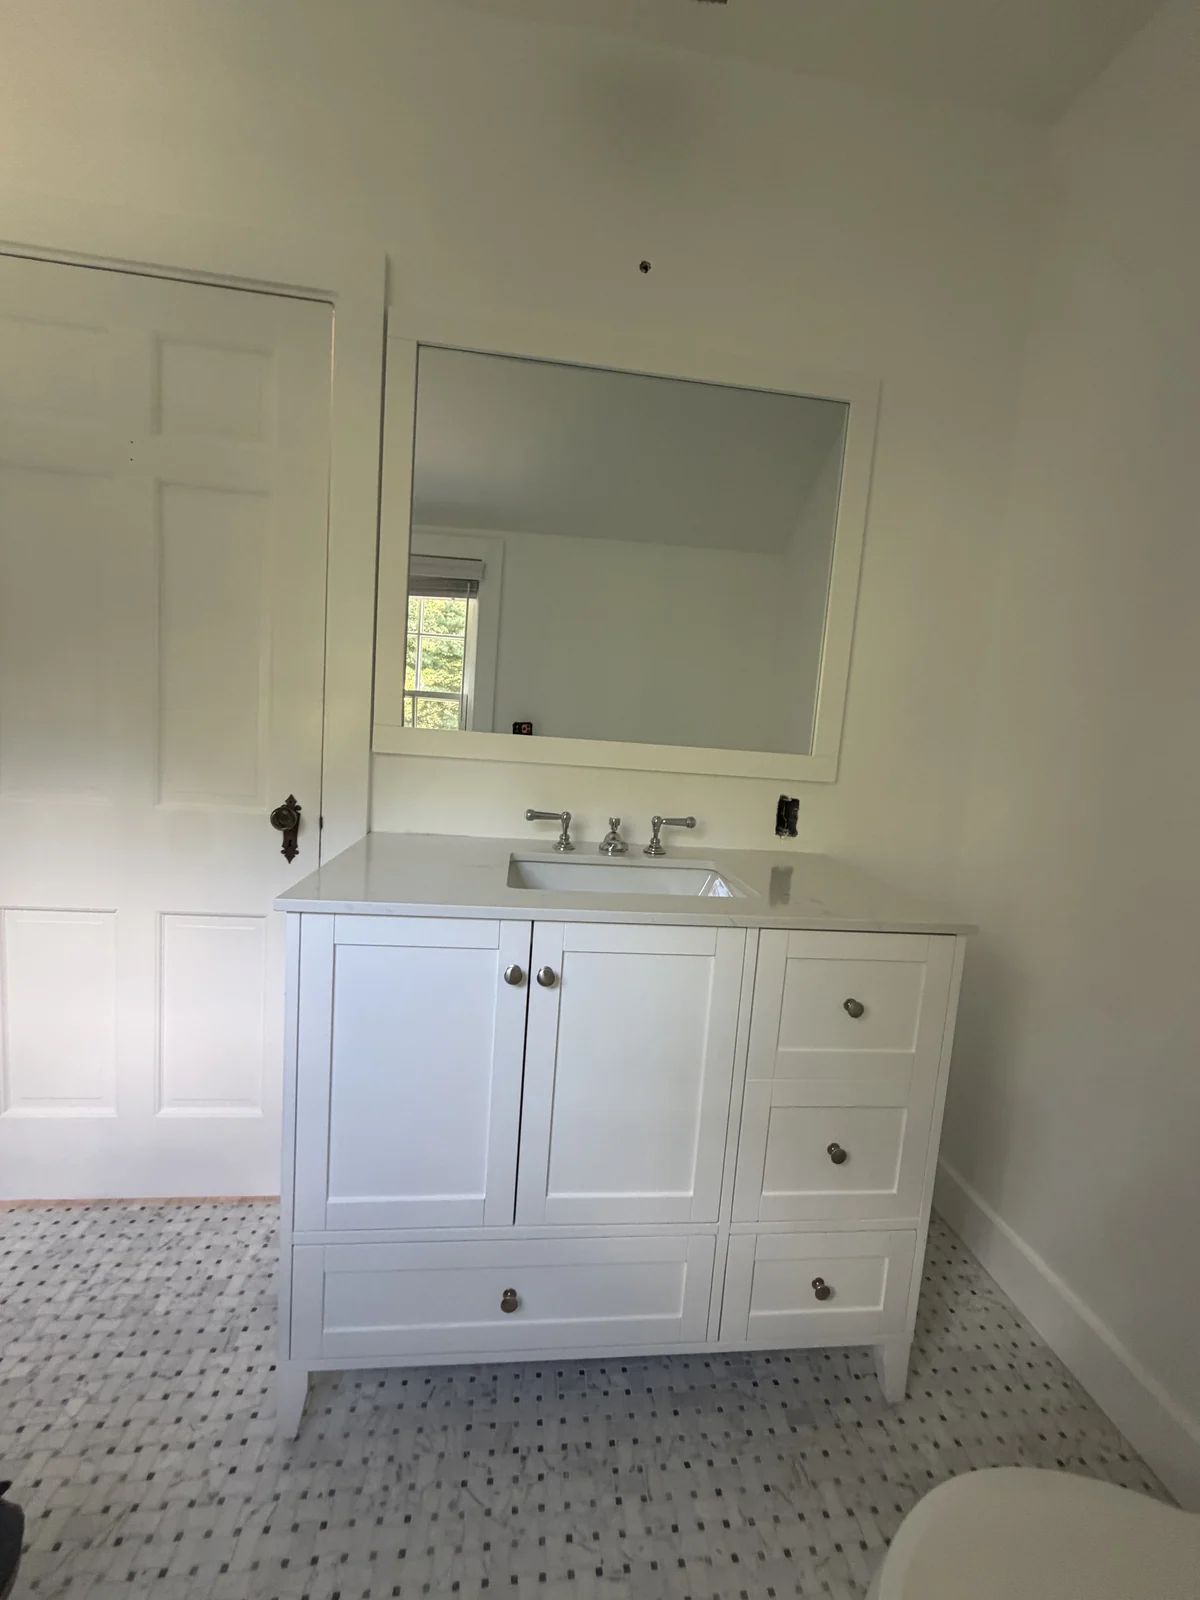
The vanity wall, before and after.
None of it was falling apart, which is exactly why rooms like this get put off for years. But a bathroom is a wet room first and a pretty room second, and the materials in this one were no longer built for that job.
Why the wood floor had to go
Hardwood in a bathroom is a gamble. Every splash from the shower, every wet towel on the floor and every slow drip at the base of the toilet finds its way into the seams. Over time the boards cup, the finish wears through and moisture reaches the subfloor where nobody can see it. We replaced it with a marble basketweave mosaic, a classic pattern that suits an older house and gives bare feet a little more grip than a large polished tile.
Tile is only as good as what is under it, so the floor work started below the surface: checking the subfloor for soft spots, making sure it was stiff and flat, and setting the right underlayment before the first sheet of mosaic went down. If you want the long version of how we approach that part, read our guide to tile floor installation.
Opening up the shower
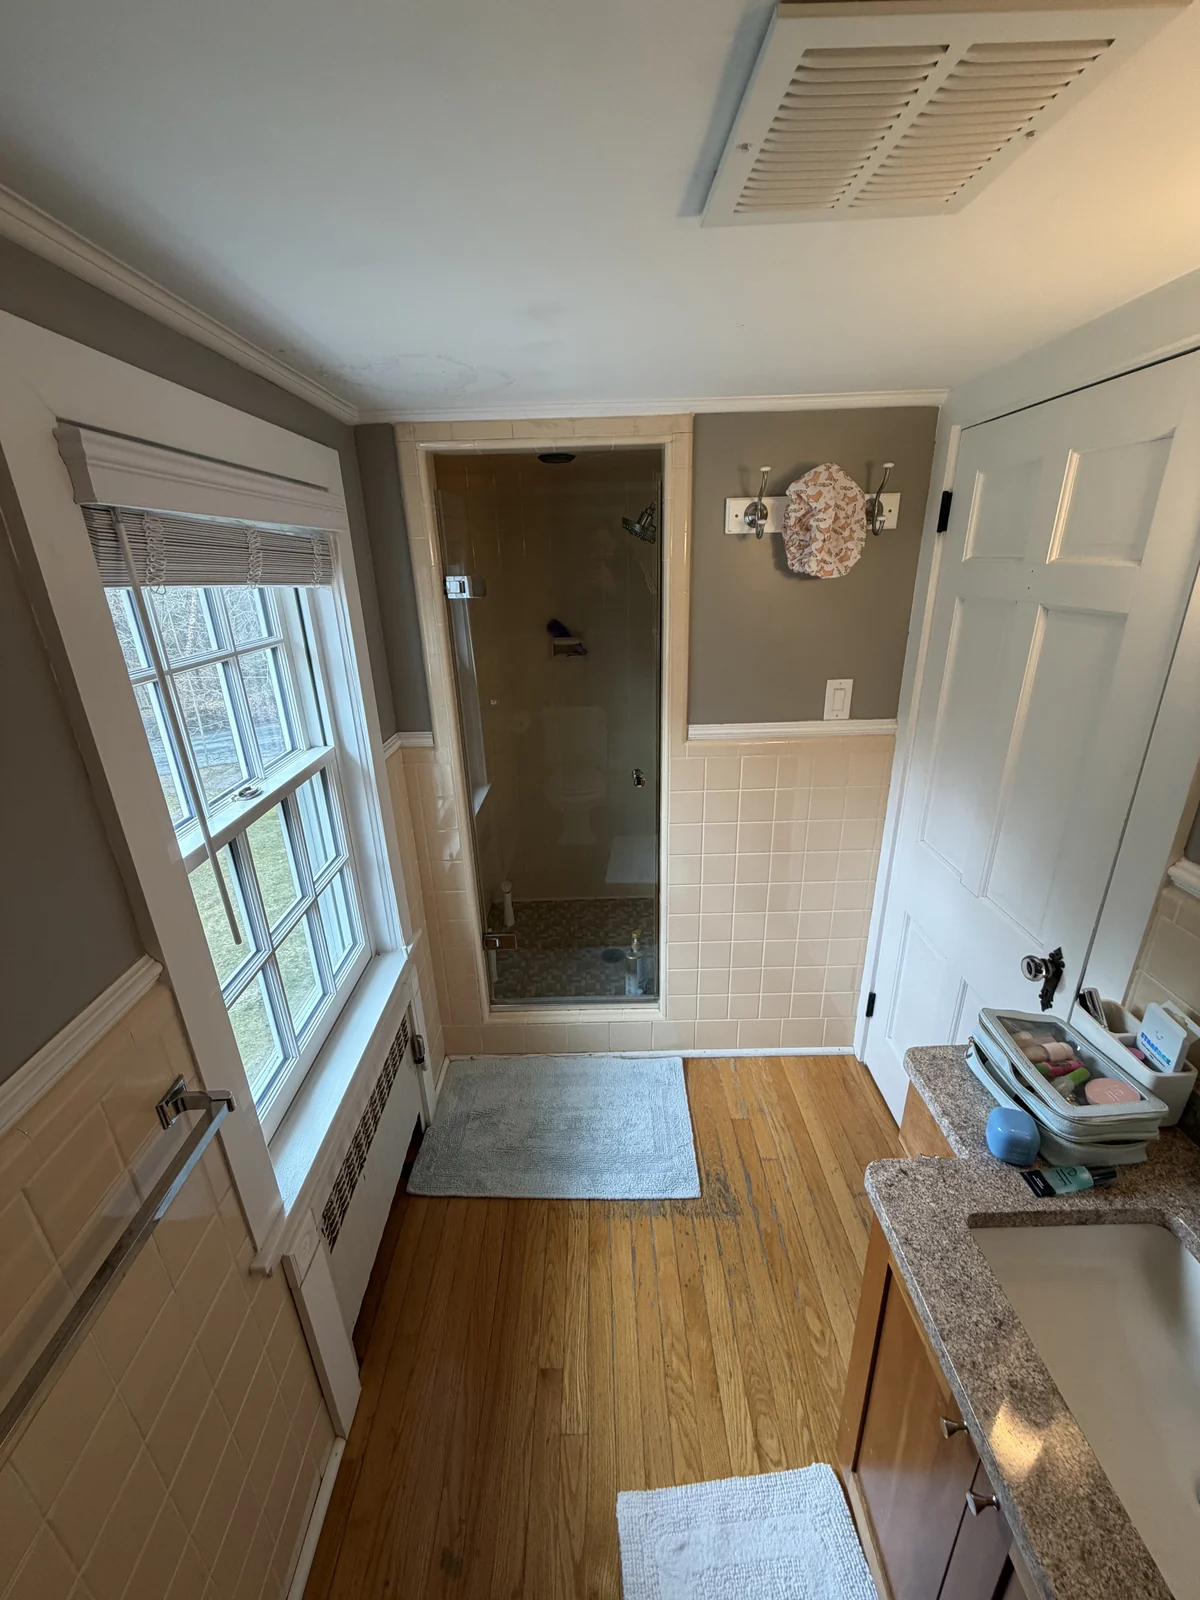
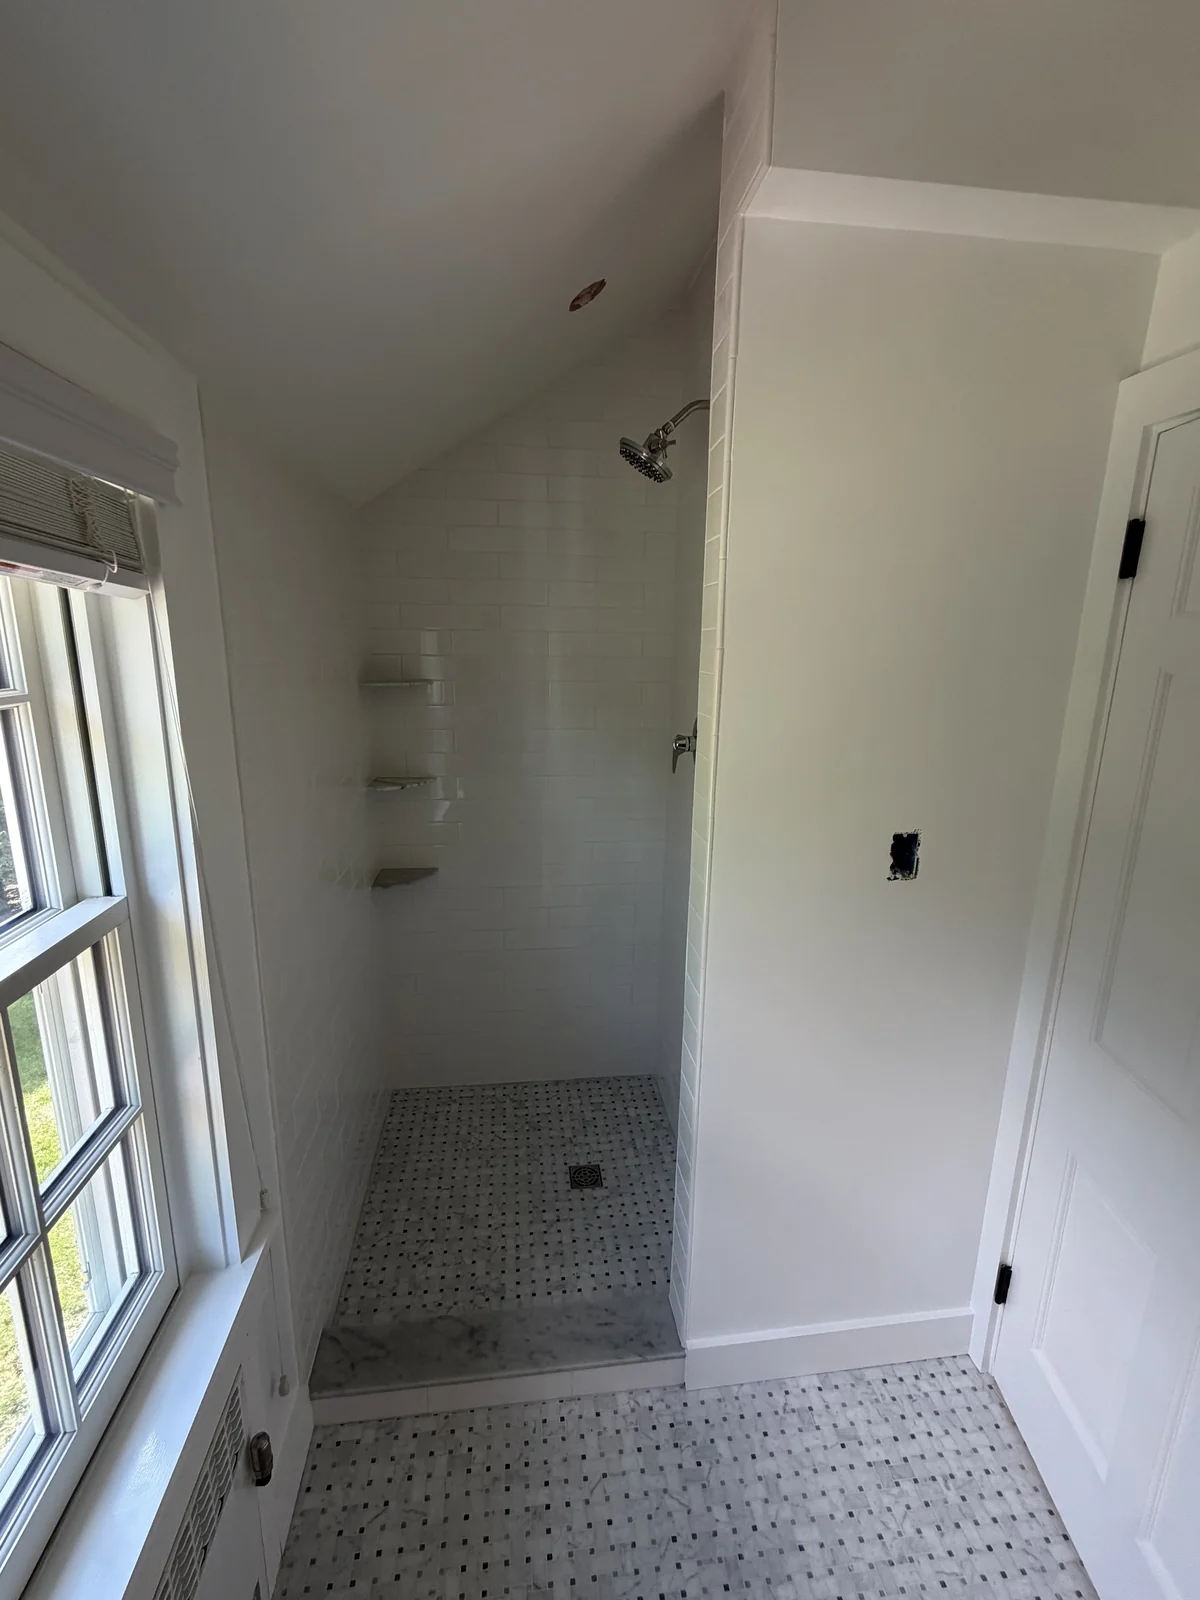
The shower alcove, before and after.
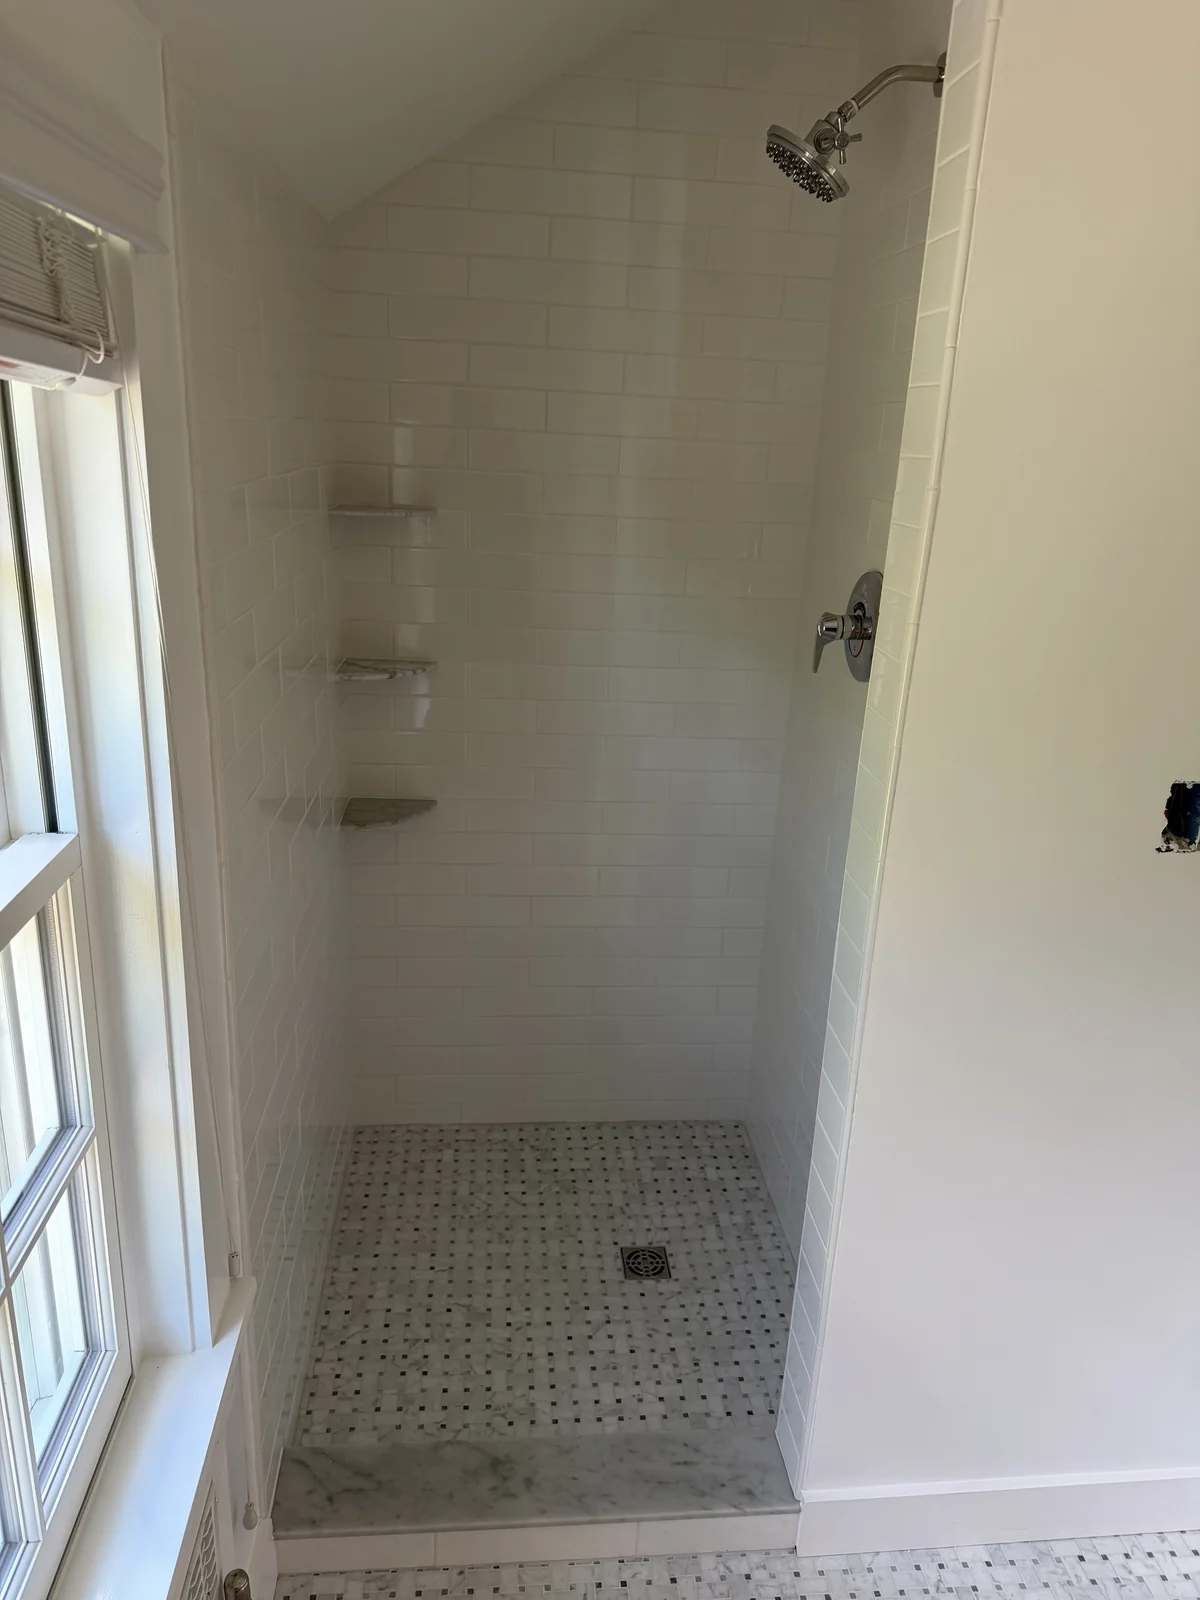
The glass stall made a small alcove feel even smaller, and the sloped ceiling above it made the door awkward. We took the alcove back and rebuilt it as an open walk-in shower: white subway tile on the walls, a marble curb at the entry, corner shelves set into the tile instead of a hanging caddy, and a marble mosaic on the shower floor to match the rest of the room.
An open shower like this only works if the water does what it is told. That means a floor sloped properly toward the drain, waterproofing behind the tile and under the shower floor, and a curb built so water stays where it belongs. Those are the parts nobody photographs, and they are the reason a shower still looks good ten years later.
A vanity that fits the room
On the vanity wall we went bright and simple: a white shaker vanity with a quartz top, a framed mirror to match, and fresh paint on smooth walls where the tile wainscot used to be. Painted walls are easy to refresh later, and with the shower and the floor doing the heavy lifting, the rest of the room did not need more tile to look finished.
What this bathroom can teach you about yours
- Look at the floor first. If your bathroom has wood or vinyl that is lifting at the edges, plan for tile, and plan for the subfloor work underneath it.
- Enclosed glass stalls in small alcoves can often become open walk-in showers, which makes the room feel larger and easier to clean.
- Spend where the water lives. Waterproofing, slope and careful tile setting matter more than the most expensive faucet.
- Keep finishes timeless if you plan to stay. White tile, marble mosaics and a shaker vanity will not date the room in five years.
Every bathroom is different, but the order of the work is always the same: get the hidden parts right, then make the visible parts beautiful. You can see more of our bathrooms on the bathroom remodeling page, or ask for a free estimate and tell us what is bugging you about yours.